 ultimate-guide
How to Collect Digital Evidence from Mobile Devices
Table of Contents
- What You'll Need Before You Start Collecting Digital Evidence
- Step 1: Secure the Device and Preserve Volatile Data
- Step 2: Establish Legal Authority: Warrant, Subpoena, or Consent
- Step 3: Choose Mobile Device Data Extraction Tools and Methods
- Step 4: Follow Mobile Forensics Best Practices for Data Integrity
- Step 5: Maintain Digital Evidence Chain of Custody
- Step 6: Validate Extracted Data and Address Anti-Forensic Countermeasures
- Common Mistakes to Avoid When Collecting Digital Evidence
- Frequently Asked Questions
Last Updated: September 28, 2026
What You'll Need Before You Start Collecting Digital Evidence
To collect digital evidence from mobile devices is the process of preserving, extracting, and documenting data from a phone or tablet so it can be used in a legal, disciplinary, or investigative proceeding. Get the order of operations wrong and the evidence becomes worthless, no matter how incriminating the content is.
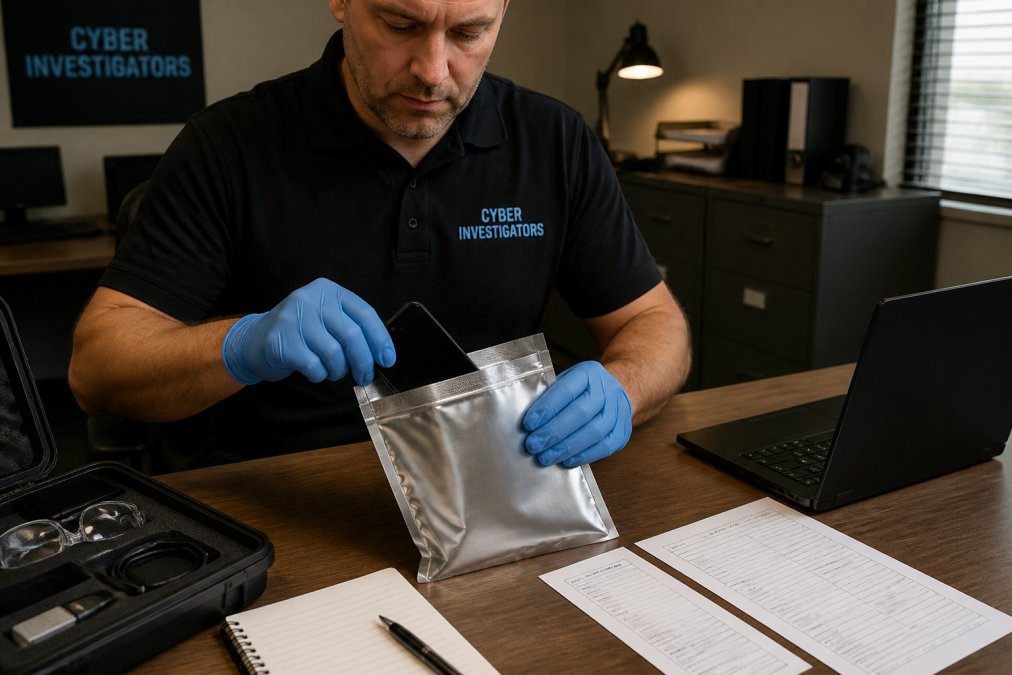
This guide walks through the field sequence for collecting digital evidence: secure first, authorize second, extract third, document everything. Below, we'll show you exactly how to collect digital evidence from mobile devices without handing a defence lawyer an easy dismissal.
Before you touch a single device, assemble the following:
- Faraday bag or isolation pouch to block cellular, Wi-Fi, and Bluetooth signals
- Write blocker and forensic workstation for any connected storage
- Chain of custody forms with tamper-evident evidence bags
- Legal authority documentation: warrant, subpoena, or signed consent
- Notepad or camera for photographing the device state before anything changes
A common mistake is arriving without a Faraday bag. By the time you return with one, a remote wipe command may already have erased the device.
Step 1: Secure the Device and Preserve Volatile Data
Volatile data disappears the moment a device loses power. Lock screen notifications, open chat threads, and active session tokens live in memory and vanish on shutdown.
Follow this sequence:
- Photograph the screen as found, including any notification banners.
- Enable airplane mode if the device is unlocked, then place it in a Faraday bag.
- If the device is locked, bag it immediately without attempting to unlock it.
- Record the battery level, screen state, and network status on your custody form.
Step 2: Establish Legal Authority: Warrant, Subpoena, or Consent
Legal authority determines what you may extract and how far you can go. Three instruments cover most situations, but the scope language inside each one is what actually constrains your extraction.
The biometric unlock question competitors skip
Modern phones encrypt storage by default. On iOS and most Android devices, a physical image without the unlock credential yields ciphertext, not evidence. That pushes investigators toward compelled unlocking, and the law here is unsettled.
Scope discipline in practice
Read the authorization before you connect anything. Build a written extraction plan that maps each data category you intend to pull to the specific clause of the warrant, subpoena, or consent form that authorizes it. If a category is not covered, leave it. Over-collection is the fastest route to suppression, and it is entirely avoidable with a one-page plan.
Step 3: Choose Mobile Device Data Extraction Tools and Methods
Mobile device data extraction tools fall into three tiers, and the tier you choose determines what you can recover and how defensible it is.
- Manual review captures what's visible on screen. Fast, cheap, and limited to unlocked devices.
- Logical acquisition pulls data the operating system exposes through its own interfaces: messages, call logs, contacts, and application databases.
- Physical imaging creates a bit-by-bit copy of the storage, including deleted files and hidden partitions. It requires specialized hardware and, on modern encrypted devices, a valid unlock credential.
| Method | What It Recovers | Access Needed | Best For |
|---|---|---|---|
| Manual review | On-screen content | Unlocked device | Quick triage |
| Logical acquisition | App databases, chat history, metadata | Unlock credential or backup | Most civil cases |
| Physical imaging | Deleted data, full file system | Unlock credential, specialized tools | Criminal and complex matters |
Step 4: Follow Mobile Forensics Best Practices for Data Integrity
Mobile forensics best practices exist to answer one question later: can anyone prove the data wasn't altered? Every action you take should be defensible on that basis. The mechanics matter more than the checklist.
Write blocking and imaging
A write blocker sits between the forensic workstation and the storage medium and intercepts write commands so nothing modifies the source. For mobile devices, the equivalent discipline is to work from a forensic image rather than the original handset. Once imaging is complete, the original device is sealed and stored, and all analysis happens on the copy.
Hashing as a verifiable fingerprint
A cryptographic hash function takes an input of any size and produces a fixed-length output. Change one bit of the input and the output changes completely. That property is what makes hashing useful for evidence integrity.
- Hash the source image immediately after acquisition using a known algorithm such as SHA-256.
- Record the hash value on the custody form alongside the tool name and version.
- Re-hash the working copy before analysis and compare.
- Re-hash again after analysis to confirm nothing changed during review.
Encryption changes the calculus
Modern phones encrypt storage by default. On iOS, the file system is encrypted with keys tied to the passcode and the Secure Enclave. On Android, file-based encryption protects different directories with different keys. A physical image of an encrypted device without the credential yields ciphertext, not readable data.
- Before first unlock (BFU): the device has been powered off or rebooted and not yet unlocked. Most user data is inaccessible.
- After first unlock (AFU): the device has been unlocked at least once since boot. Some keys are in memory and more data is reachable, but the device may relock.
Post-extraction validation: the step most guides skip
Validation confirms the extraction is complete and unaltered. It is also where strong admissibility arguments are won or lost.
- Compare chat history against cloud synchronization records obtained by subpoena.
- Compare call logs against carrier call detail records.
- Compare location artifacts against cell site location information.
- Compare application timestamps against the device's system clock and timezone settings.
Tool documentation
Record the tool name, version, and settings for every extraction. Forensic tools update frequently, and a result that is reproducible in one version may not be in another. If a tool is later shown to have a bug affecting a data category you relied on, your documentation is what lets you assess the impact.
Step 5: Maintain Digital Evidence Chain of Custody
Digital evidence chain of custody is the documented, unbroken record of who handled the device, when, and what they did with it. Break the record and opposing counsel will argue tampering.
Every transfer needs an entry with:
- Date and time
- Full name and signature of the person releasing
- Full name and signature of the person receiving
- Purpose of the transfer
- Storage location and seal condition
Step 6: Validate Extracted Data and Address Anti-Forensic Countermeasures
Validation confirms the extraction is complete and unaltered. Anti-forensic countermeasures try to make sure it isn't.
Anti-forensic countermeasures to plan for:
- Remote wipe commands sent while the device still has connectivity
- Factory resets that clear user data before seizure
- Encryption that locks content behind a credential you don't have
- Third-party wiper apps that overwrite free space on a schedule
Common Mistakes to Avoid When Collecting Digital Evidence
The mistakes that sink cases are procedural, not technical.
- Powering on a locked device to check ownership, which can trigger encryption and destroy volatile data.
- Skipping the Faraday bag and losing the device to a remote wipe.
- Extracting beyond the authorized scope, which risks suppression of everything.
- Working from the original device instead of a forensic image, contaminating the source.
- Leaving gaps in the custody log, which opposing counsel will exploit.
- Failing to validate, so nobody can prove the extraction is complete.
The real difference between evidence that holds up and evidence that gets thrown out comes down to documentation discipline. Technical skill recovers the data. Procedure keeps it admissible.
Frequently Asked Questions
What are the legal requirements for collecting digital evidence from mobile devices?
You need lawful authority: a search warrant, subpoena, or valid consent. A warrant requires probable cause and must specify the device and data scope. Subpoenas compel service providers to release cloud-stored data. Consent must be voluntary and documented. Without proper authorization, evidence can be challenged as illegally obtained. Always consult legal counsel to ensure compliance with applicable laws, as requirements vary by jurisdiction and case type.
How do you ensure the chain of custody for mobile evidence?
Document every person who handles the device, when, and why. Use evidence bags with tamper-evident seals, assign unique exhibit numbers, and log transfers in a bound ledger. For digital evidence chain of custody, record hash values of forensic images before and after analysis. Any gap or missing signature can break admissibility. Secure storage with restricted access and maintain detailed notes throughout the process.
What is the difference between logical and physical extraction?
Logical acquisition copies files and data accessible through the device's operating system, such as photos, messages, and call logs. Physical imaging creates a bit-by-bit copy of the entire storage, including deleted files and unallocated space. Physical extraction recovers more data but requires specialized tools and may be blocked by encryption. Logical is faster and often sufficient for basic investigations, while physical is preferred when deleted data or full system artifacts are needed.
Can deleted data be recovered from a mobile device?
Yes, deleted data can often be recovered if it hasn't been overwritten. Physical extraction and specialized mobile device data extraction tools can access unallocated space where deleted files reside. Recovery success depends on device usage, time since deletion, and encryption. To maximize chances, power down the device immediately and avoid any interaction that could write new data. Professional mobile forensics best practices include using write blockers and creating a forensic image first.
Mobile forensics moves fast, and the gap between a recoverable trail and a dead end often comes down to who is doing the work. Cyber Investigators LLC combines advanced cyber technology with traditional private investigation techniques, which means ethical hacking, deep data recovery, and investigative rigor in one engagement rather than three. If you're facing a custody dispute, a personal cybercrime, or due diligence on a partner, hire us today and get answers that stand up in court.